The Springfield train show was held on December 1st, 2013 at the Clark County Fairgrounds outside Springfield, Ohio. I've got to say, for a five hour event with very few operating layouts, this is rapidly becoming one of my favorite shows of the fall train season. Partly, I think it's because all I have to do is shop and socialize, unlike the other shows where I'm 'working' the MVSG train layout
This year I found some great bargains on out of production Showcase Line (S-Helper) cars and a good deal on a American Models box car. Beyond that I purchased some old Plasticville fencing material (the white two-rail section fence) that is a great border for the residential community of "Ridgeville" on the layout.
Time to get back to work - there's track to be cleaned!
Sunday, December 8, 2013
The ballasting nears completion!
Most of the outer loop is ballasted - just have one outstanding grade crossing to complete (and that's really more about getting the road and grade crossing beams installed than anything else.
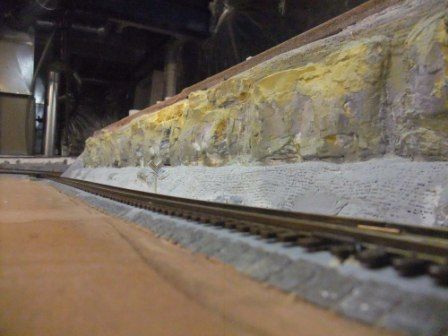
I should write that I am done installing the ballast. What remains now is more properly classed as 'clean up'. Going back over my earlier work - especially the first loop that I did - I see that I did a pretty bad job. So bad that in some cases the ballast is impacting the operation of the trains. So....I'll need to go over each rail and scape off excess ballast. It'll give me a change to check the rails as well - there are still a couple of spots that are giving me problems like uncoupling and occasional derailments.
I'm starting on some of the landscape now as well. There are some very simple areas that can be knocked out quickly. (bare stony ground with scrub vegetation). I'm experimenting with the grassy areas. Most of my prior work was on much smaller areas and in much smaller scales. I need to adapt to the level of detail S gauge trains require.
Tuesday, August 27, 2013
Tales from the track gang...
The ballasting continues. I've got it down to a routine set of steps and its made a big difference. I finish the second loop of track today, which leaves me with the outer loop and the 'north' yard to deal with. That's not too bad considering that all the track is not yet in the north yard yet.
A pictures worth a thousand words, so here are some photos of the recent progress.
A pictures worth a thousand words, so here are some photos of the recent progress.
 | ||
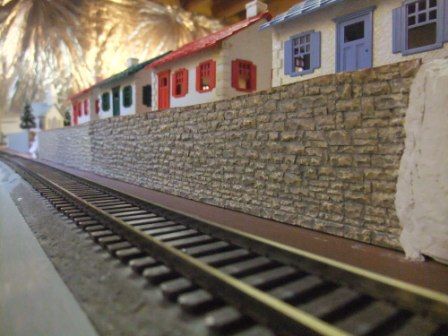
| The south yard with the inner and middle tracks ballasted. |
 | |||||
| The north yard. Still work to do in the gaps between the different loops. |
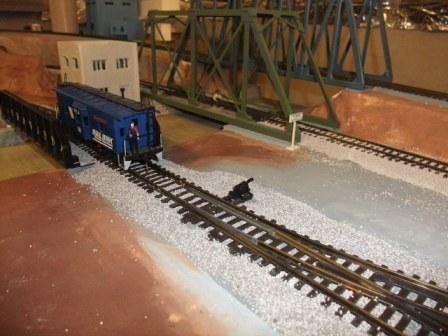 |
| The inner track with a caboose for scale purposes. |
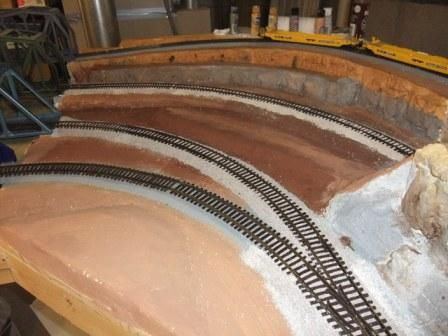 |
| The middle two tracks are ballasted. |
Sunday, July 28, 2013
If I knew what a pain ballasting track is...
I would not have laid so much track!
At least I started. And as with so many things, doing something new means learning how to do it. I've used Woodland Scenics flocking material before, but not in a challenging setting like railroad track. First you've got to get the glue on the sides of the roadbed, they apply ballast, the apply ballast between the rails. Then smooth it all out. Then apply a wetting agent and then apply the glue. You do this for about one or two feet of track.
Then you get to start over.
I'll add some pictures of the finished ballasting. I'm sure it will look good when finished.
By the time I'm done, I should be a real ballasting expert.
Thursday, June 20, 2013
We want...another shrubbery! (or at least work on the layout)
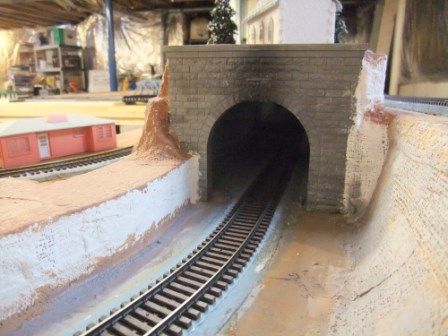
No, no shrubbery yet, but I've made progress since the last post. Mostly laying down a base coat of paint and, getting tunnel portals installed and painted and some miscellaneous track laid in the south yard.
 | |
| The north yard viewed from the west. The base paint coat | provides some character and defines the stream. |
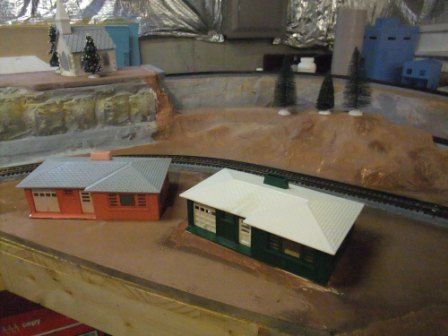 |
| Two Plasticville ranch homes provide some color. |
 |
| A woman with two kids awaits a train. |
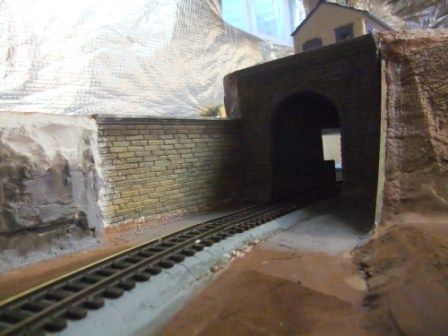 |
| The south portal. |
 |
| Different view showing the tunnel runs under 'tracked ridge'. |
 |
| The cut on Tracked Ridge. |
 |
| Looking back at the previous photograph from the north. |
 |
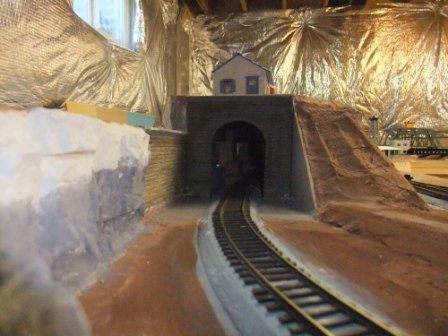
| The North Portal. (And repuposed Lionel portal, cut down to S.) |
|
| The ranch homes are in the curve in front of the north portal. |
 |
| The Long Cut on the east face of Tracked Ridge. |
 |
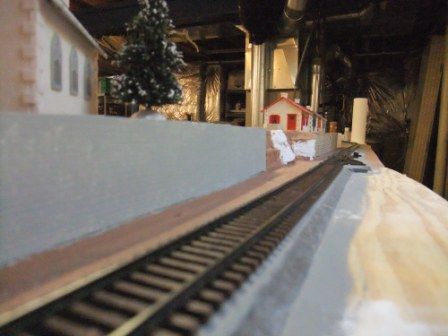
| The south yard now has its first staging track installed. (The one of the left is temporary floating track.) |
Tuesday, May 14, 2013
Its a Phase...
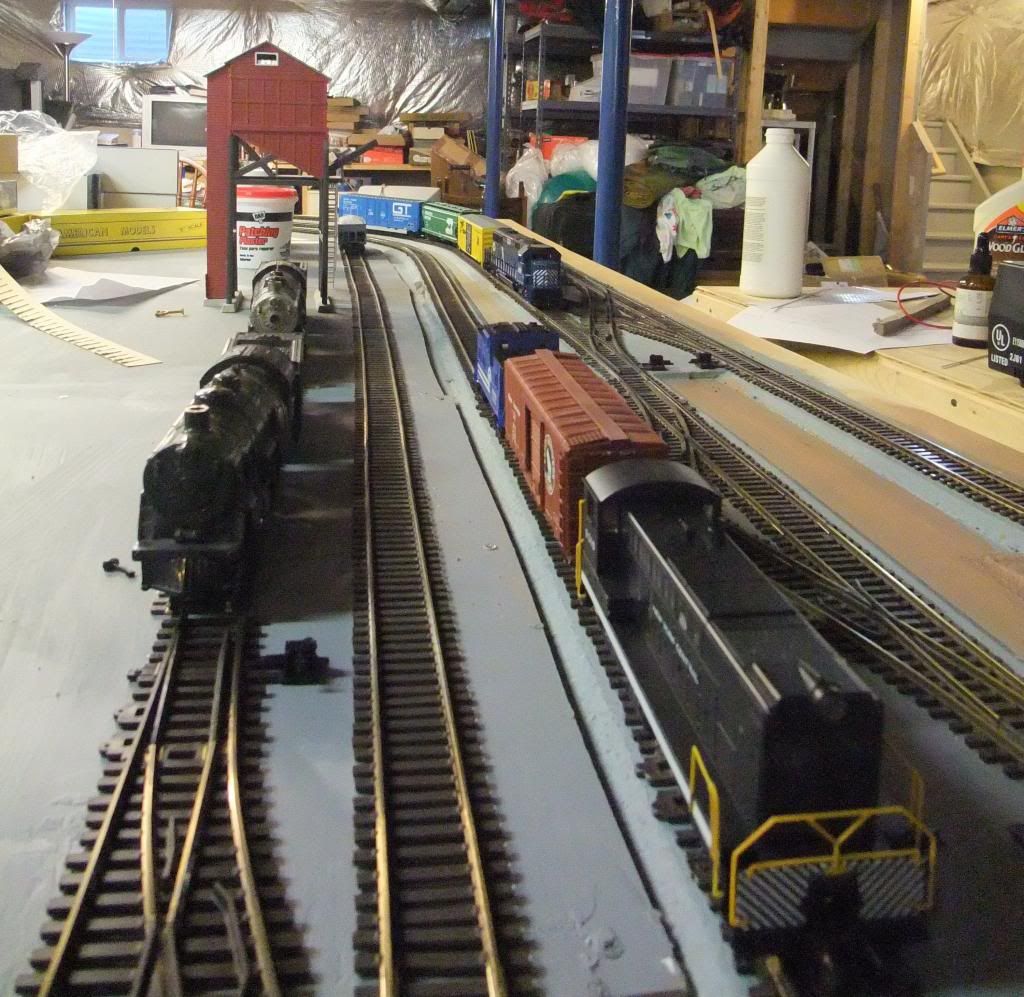
Got three loops of tracks running AND solved the nasty problem with one of the transformers being out of phase. You know...when you have to reverse the plug to change the polarity. Now I can run three trains independently and have them cross-over between loops. Tonight's action featured the SD-70 and SD-60 and an old American Flyer Atlatnic 4-4-2 (The 300 AC for those keeping score.)
Its starting to feel like a layout!
Its starting to feel like a layout!
Sunday, April 21, 2013
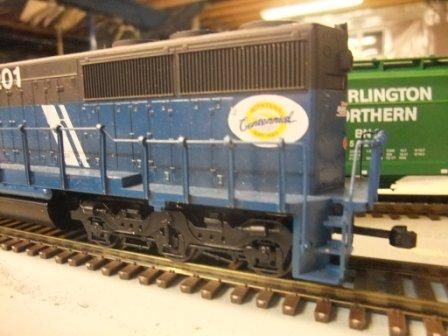
The Montana Rail Link Bonanza!
In my previous post, I was showing off the new American Models SD-60 I purchased. Right on the heels of that, the same seller made me an offer I couldn't refuse - four (4) S gauge 50 foot boxcars for a very reasonable price. All four boxcars are in the blue and white livery of - you guessed it - the Montana Rail Link railroad.
The boxes cars are a mix of American Models (3) and Pacific Rail Shops (1) 50 foot boxcars. Apparently the PRS car is something of a rarity.
From the limited information I received, I don't think PRS produced a kit of the MRL boxcars, but then my Google-fu is weak as I can't find a comprehensive list of PRS cars on the web. I think its a re-painted kit as the blue is a little off from the pictures of the real MRL stuff I've seen (and a little lighter than the American Models color as well.
About the only other thing I can find that is 'off' about it is that I think the decals and lettering are reversed. The plans I have of the prototype show that the logo and name should switched (the American Models car has it correct). I do like it as it has the "W" logo with the moutain lion head embelishment - something the American Models stuff lacks (but which is still correct).
But the real treat was also unexpected. The seller included a unique American Models bay window caboose that is ALSO painted up for the Montana Rail Link. Its another custom paint job that is a little freelanced. Part of the problem is that I can't find a reference to the MRL using bay window caboosees, But still its a great addition to the collection.
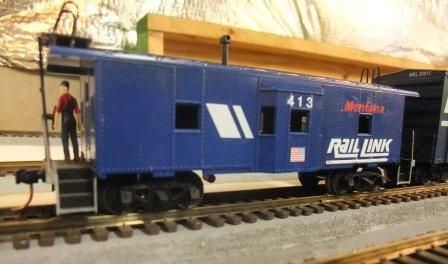
This is a really great addition to my collection. The MRL are one of the few railroads to continue to use the caboose into the modern era of "Fred and Wilma" modern sensors and controls. No one makes a MRL caboose ready to roll in S. I was resigned to doing a quick paint job to renumber a Burlington Northern caboose to the MRL roster (there's a photograph of the prototype out there!)
The boxes cars are a mix of American Models (3) and Pacific Rail Shops (1) 50 foot boxcars. Apparently the PRS car is something of a rarity.
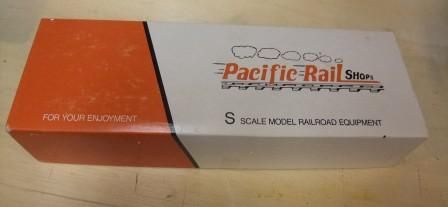 |
| The original PRS box |
From the limited information I received, I don't think PRS produced a kit of the MRL boxcars, but then my Google-fu is weak as I can't find a comprehensive list of PRS cars on the web. I think its a re-painted kit as the blue is a little off from the pictures of the real MRL stuff I've seen (and a little lighter than the American Models color as well.
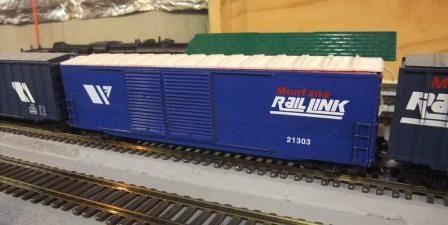 | ||
| The Pacific Rail Shops 50' car |
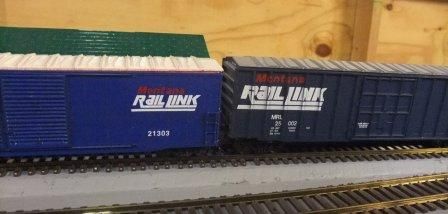 |
| Good comparison of the PRS car (on left) with an American Models car |
But the real treat was also unexpected. The seller included a unique American Models bay window caboose that is ALSO painted up for the Montana Rail Link. Its another custom paint job that is a little freelanced. Part of the problem is that I can't find a reference to the MRL using bay window caboosees, But still its a great addition to the collection.
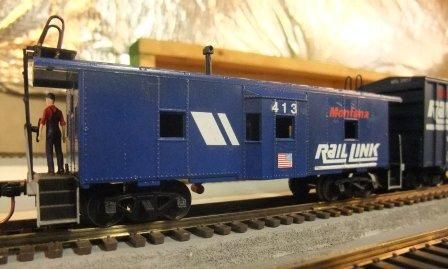 | ||
| You can see how it scales next to the American Models boxcar on the right. Plus its a nice shot of the brakeman standing on the back of the caboose. |
This is a really great addition to my collection. The MRL are one of the few railroads to continue to use the caboose into the modern era of "Fred and Wilma" modern sensors and controls. No one makes a MRL caboose ready to roll in S. I was resigned to doing a quick paint job to renumber a Burlington Northern caboose to the MRL roster (there's a photograph of the prototype out there!)
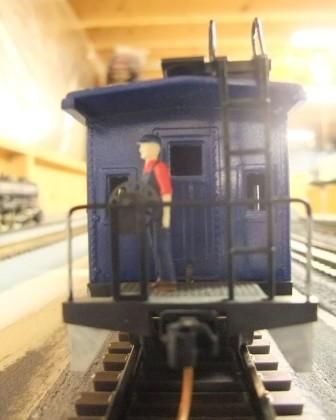 |
| Close up of the back of the caboose. Unlike a new American models kit, this one has no window glazing or internal lights....for now! |
Wednesday, April 17, 2013
Another SD-60!
Yes, another SD-60. I had the opportunity to acquire another American Models SD-60 locomotive from a sale on the Yahoo groups. These are getting hard to find and are almost out of stock at American Models. But this one is even more unique...its painted in the livery of the Montana Rail Link railroad.
Okay so the MRL does not (and likely has never) used the SD-60 in operations, but this was a rare opportunity to acquire and MRL locomotive in S Gauge.
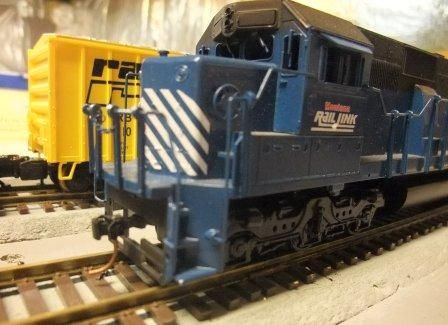
Its nicely painted in the colors of the MRL with great looking decals and even a decal celebrating Montana's recent centennial.
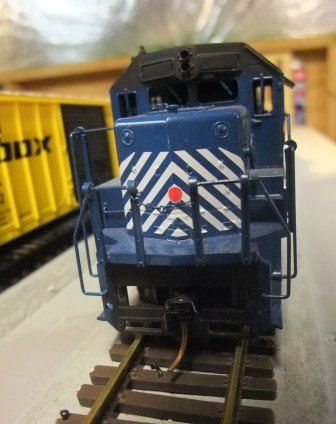
The only quibble I might have is that the locomotive number is located too high on the body. All the MRL pictures I have show the numbers in the blue paint below the black vents and exhaust area. But its a little thing.
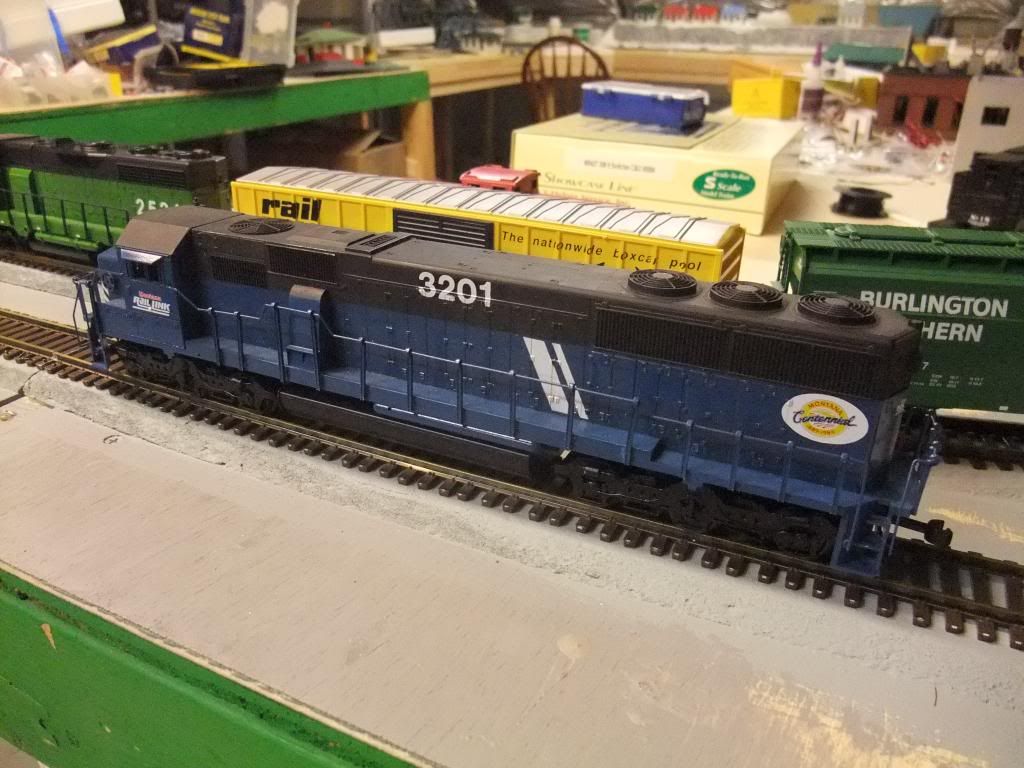
I'm going to enjoy matching this up with a consist of MRL and Burlington Northern rolling stock. I'm very happy with the locomotive!
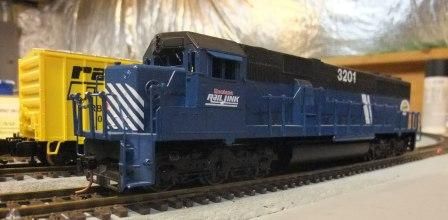 |
| MRL 3201 takes the track on Ray's home layout |
Okay so the MRL does not (and likely has never) used the SD-60 in operations, but this was a rare opportunity to acquire and MRL locomotive in S Gauge.
Its nicely painted in the colors of the MRL with great looking decals and even a decal celebrating Montana's recent centennial.
 |
| The centennial decal |
The only quibble I might have is that the locomotive number is located too high on the body. All the MRL pictures I have show the numbers in the blue paint below the black vents and exhaust area. But its a little thing.
I'm going to enjoy matching this up with a consist of MRL and Burlington Northern rolling stock. I'm very happy with the locomotive!
The wreck train is..."unwrecked"
You may have read my prior post regarding the New York Central wreck train.
This pretty little train suffered and electrical failure when it derailed. It took a couple of months and an appeal for assistance to Ron Bashita of American Models, but the problem has been identified and fixed!
When the locomotive derailed, it apparently shorted one of the electrical pickup wires in a truck.
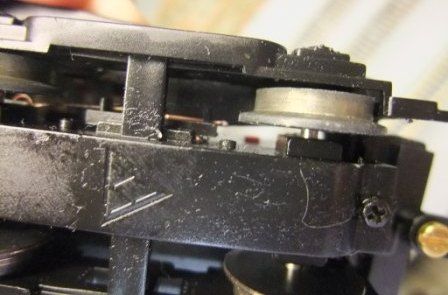 |
| You can see the melted end of the wire just to the left of the upper wheel. |
The short overloaded the tiny little phosphor bronze wire and half if it disappeared. As a result, the electrical power was not being picked up by all the wheels and the locomotive would just stop - especially on a curve, but really most any time it would just stop.
So after getting the requisite replacement parts from American Models, I grabbed the flashlight, the screwdriver and the tiny modelling pliers and tackled the job. Its really a case of pulling two screws, separating the bottom of the truck case and unscrewing the retaining screw for the pick up wire. Took me maybe 30 minutes and most of that was either trying to figure out how the truck separated or struggling to get the wire in the right position.
But now the locomotive runs....just in time for the upcoming spring train show season!
Sunday, March 24, 2013
It's electric!
I've had the three loops of track laid in for a few months now. But I had managed to assemble it as basically one big circuit - one transformer powered everything and everything got the same amount of current. After mulling this over for MONTHS, I took the first steps to create separate blocks. The good news - I am now using two transformers. The bad news - only two tracks operational.
This is okay - I need to thing this one through so that the cross overs are wired correctly so they will receive power from at least one of the power transformers.
Not related to the power, but I installed another corner piece to even out the 90 degree corners and provide a buffer between the table edge and the tracks.
Lastly - I need a follow up post that should be titled "Why didn't I take shop in High School?" There are lots of basic things that I don't seem to know. More on that later.
Sunday, March 10, 2013
More video of the SD70
A couple of short videos showcasing the recent American Flyer SD70. Its operating with a conventional transformer (specifically, my American Models transformer with built in horn and bell buttons). So no Legacy or TMCC features can be shown. However, it still turns in a nice performance.
This second video does a great job capturing the sound effects present with the locomotive. You can hear the bell and the horn. A short horn blast triggers a random 'crew talk' effect the list of sounds.
I am enjoying the SD70. If I have a regret, its that I did not order a second one at the 'pre-order' prices in 2012. The budget does not support the current list price.
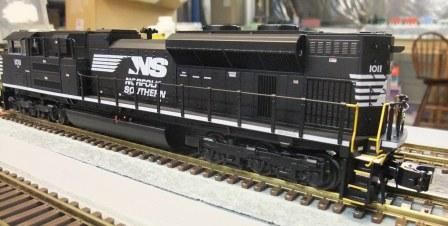
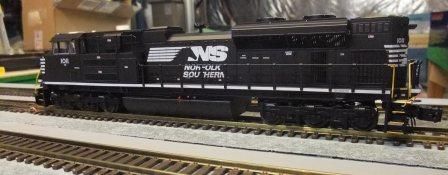
Wednesday, February 20, 2013
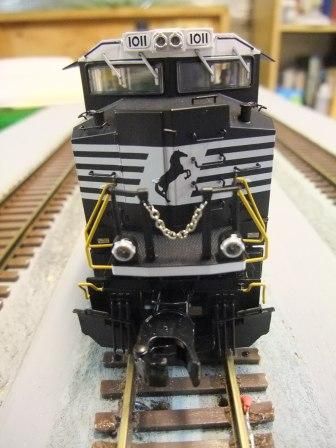
The new American Flyer SD70ACe is out!
Last year (a long long time ago) Lionel announced a new S locomotive - the SD70ACe. Being a sucker for a modern locomotive I immediately ordered on in Norfolk Southern livery. On February 20, 2013, the new locomotive arrived at my home. I think it was worth the wait.
Externally, this a gorgeous piece of equipment. I expected as much as this followed on the heels on the "legacy" equipped U33C in 2012. The level of detail is excellent.
The SD70 is another in the line of Legacy equipped locomotives and you really need a legacy system to get all the value out of this item. But even running in conventional mode, this will be a real treat hauling a string of intermodal containers or some of the long awaited cylindrical grain hoppers.
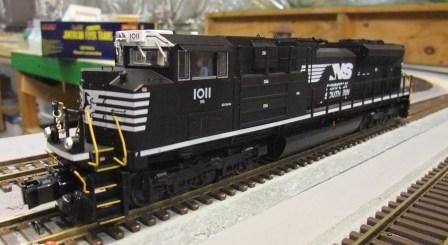 | |||
| Fresh out of the box 1011 sits with crew in the cab. |
 |
| Rear end showing the cooling fans and dynamic brakes. The fan cowling lifts off to reveal the controls. |
 |
| The detail on the lettering is excellent. |
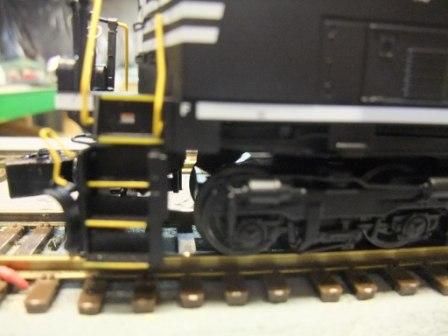 |
| The coupler and the stairs pivot independently of the trucks. |
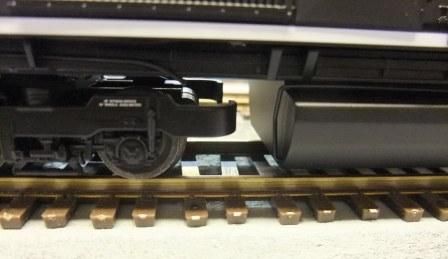 | |||||||
Lionel did not use the fuel tank mounted motors as they did on the U33C.
|
 |
| Nice detailing with the ditch lights, MU hoses and grab rails. |
Thursday, January 3, 2013
The New York Central Wreck Train
No...its not a wreck. This is the train you send in to clean up the wrecks. A diesel switcher pulling a heavy crane, a floodlight and some cars to cart the scrap and service the crane.
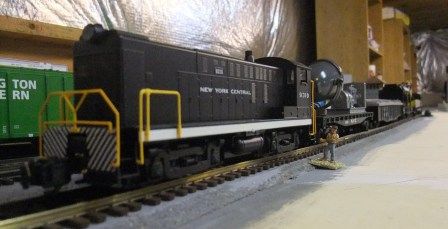 |
| The wreck train headed up by a Baldwin S-12 Switcher |
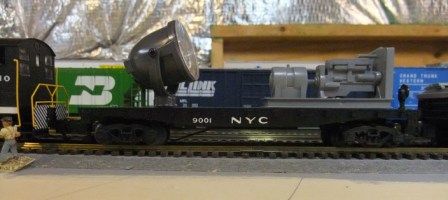 | |||||
| The operating floodlight car - it really does light up when the track is powered! |
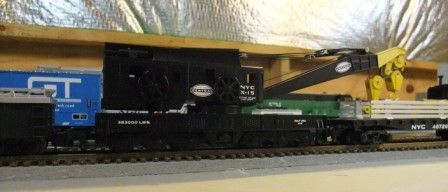 |
| The Brownhoist crane car. This is a heavy piece of rolling stock with 6 wheel trucks. |
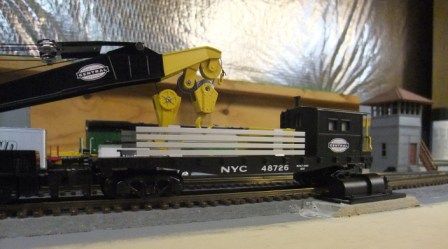 | ||
| The crane work car. Its a combination caboose and flat car. This is the companion piece to the Brownhoist crane. As you can see they fit together as a nice unit. |
Tuesday, January 1, 2013
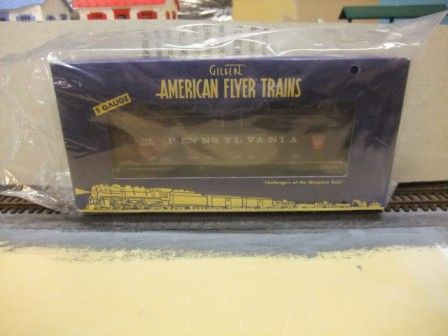
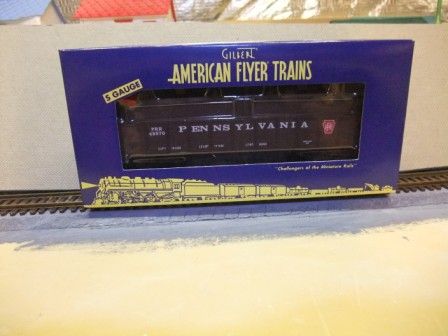
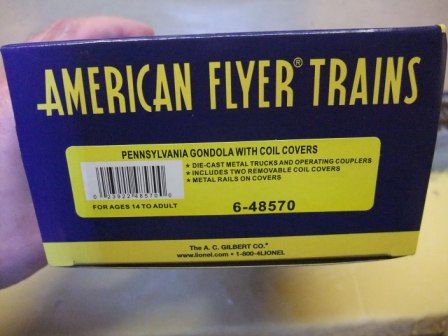
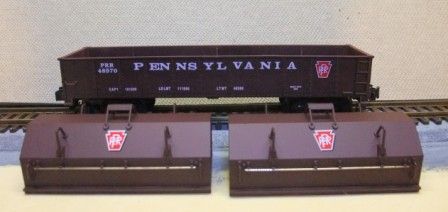
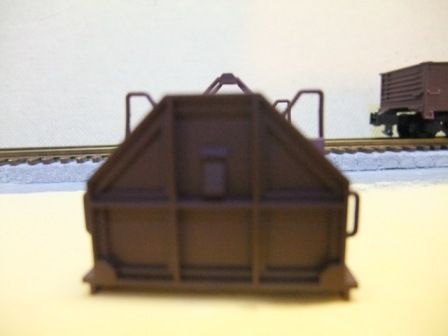
New American Flyer Mill Gondola with coil covers
My new American Flyer car arrived today - A Pennsylvania mill gondola with coil covers. It is a good addition to the two other gondola's with coil covers that American Flyer has produced - the Bethlehem Steel gondola and the EJ&E car from the NASG. Its not a bad car, but the overall tuscan red paint job is sort of...boring.
Here are some photos of the new car.
Here are some photos of the new car.
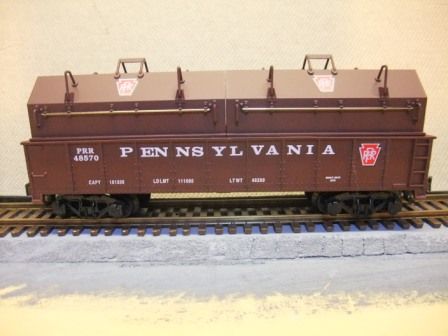 |
| New out of the box! |
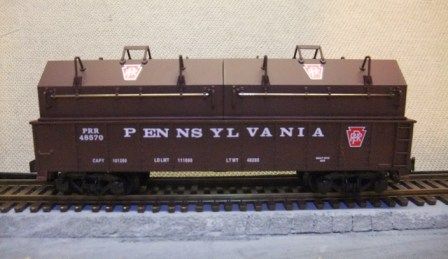 |
| The coil covers don't quite cover the entire gondola. |
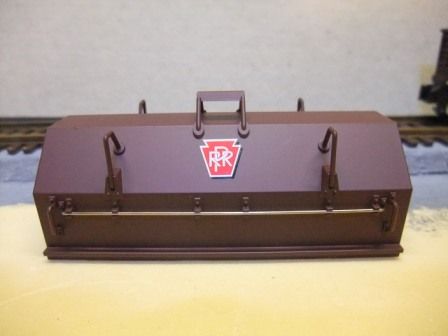 |
| Close up of the coil cover showing the detail of the brackets and grab wires. |
 |
| Nice detail on the end of the coil cover. |
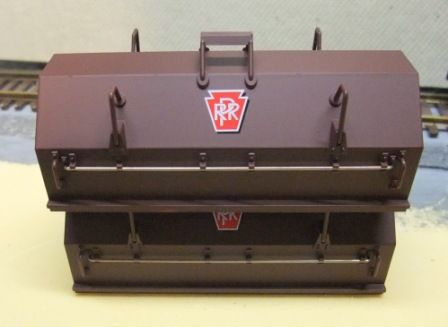 |
| The covers stack up - just like the prototype |
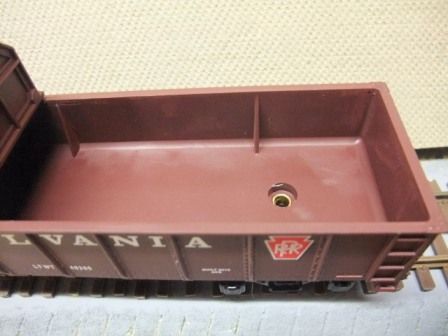 |
| The interior paint is a little uneven. |
Subscribe to:
Posts (Atom)