The Roster

Showing posts with label 1/64 Scale. Show all posts

Sunday, July 24, 2016

We want another shrubbery!

Added some additional trees to the layout. Assorted trees both deciduous and Aspens from Grand Central Gems. These were a great deal acquired at the National Train Show in Indianapolis. The savings made attending the show worth it for me.

Added a couple of the Aspen as accent trees behind the ranch houses. 

Used several more to fill in the river bank fronting the apartment building. A little low growth along the bank and this area will be done! 

Different angle looking across the river towards the waterworks. 

Might need to add a few additional trees.


Sunday, May 22, 2016

40' and 45' shipping containers

In a prior post I showed my progress painting the shipping containers. Progress on several is moving along. There was a set back with one model.

Decals on on of the 45' containers is almost done. Once applied, it will need a gloss top coat to seal the decals, then a flat coat to dull the shine.

In profile showing all the defects...


The decal went on fine, but this photo really shows off the grainy surface. I guess we'll call this one 'used'.


The ink ran while the decal was drying. I can fix most of it with over painting. But again...used.


Thought the door latches got cleaned up. But some of that gray paint remains.


The profile shot. What most people will see as it travels around the railroad.

Monday, May 16, 2016

Unboxing the new MTH TOFC with 48' trailer van

At the recent 2016 Spree, I purchased the new MTH TOFC flat car with 48' van. It's a nice car with a new van style that adds variety to the trailer offerings available in S Gauge. Here's a video of pulling it out of the box, followed by a few images and commentary.


So, that's the video overview. Here are a few pictures showing the car and trailer, with some comparisons to old SHS cars and trailer for contrast.

The flat cars are available in two road numbers.

That is one pretty van!  MTH did a nice job with these. I wonder if they will be available separately?

The MTH van on the right. You can see that the trailer hitch post on the MTH is maybe twice the diameter of the old SHS post. It makes for a very snug fit on the fifth wheel.

The overall flat black car is somewhat boring, but it does serve to place focus on the colorful trailer van.

MTH car and trailer on the left. Old SHS car and trailer on the right. The new 48' van really fills up the car nicely!

Sunday, May 8, 2016

Des Plaines Hobbies Container kits - status update

At the 2015 S Spree, I purchased several kits of intermodal containers - two 40 footers and two 45 footers to bring some diversity to my S Gauge intermodal train of Gunderson well-stack cars. While not quite done, I've gotten the kits assembled and at least a base coat applied to all four models.

The 45 footer on top is to be a Mediterranean Shipping Company (MSC) container. The 40 footer on the bottom is clearly from Hapag-Lloyd.

Decals were printed on clear decal paper using an HP inkjet printer and then sprayed with several light coats of gloss coat to seal the ink to the decal. It works okay.  This is one large decal from logo on the left to name on the right.

Painting the door latches and hinges was relatively easy. A coat of Vallejo light grey and silver grey to highlight the detail. The end text was built using Microsoft Excel and printed on clear decal paper. The labels were cut into several small pieces and added to the end of the model using Micro Set / Micro Sol to ensure the decal adhered to the model. 

One goal was to get a contrast in container colors to bring some diversity to the container load on the train.

Two shades of yellow paint were used to simulate a new container versus a container that had made several trips across the seas. Weathering will be done after the decals are applied.

Sunday, February 28, 2016

DC in an AC world...

Back in January, I purchased an American Models SD-60 locomotive from a vendor at the World's Greatest Hobby On Tour show. It was the CSX road name which is increasingly difficult to find. I took the train out of the box this weekend at the Muncie and Western train show for it's inaugural run.

The end of the box. Some wag has marked the unit as "AC". It's a high rail model, and the DC box is bot checked.


It would not work.

It just sat there and vibrated. A couple of folks looked at it. One theory is that it was a DC model (everything I have is AC).  So I set it aside and got on with the show.

Today, I had a chance to look at it. Rich B. lent me a DC rectifier that I could hook up to my AC transformers. First up, I removed the body to inspect the chassis, the motor and the gearing assemblies.

I went to disconnect the headlight and the whole circuit board came loose! Talk about a tight connection!

I also pulled the body off another SD-60 in the collection for comparison.

The CSX engine and circuit board

The AC High rail circuit board. 


As the pictures show, the two circuit boards are clearly different. I placed the chassis on the track  and hooked up the rectifier. A little bit of movement! It would move and bit then halt.I'd throw the switch and it would go the other direction.

While I had it open, I checked the rotation of the motor shaft. It was experiencing some binding, but there was nothing obviously wrong. From past experience, I know that if you overtighten the plates that secure the drive shaft mounts for the large flywheel, the shaft can bind, so I backed off the screws until the two plates were snug but not tight.

I tried it again. Success! The engine would move back and forth. But only at very low power levels. If I raise the power of the AC transformer, the engine would slow and then stop. But at low speed, the engine moved and pulled the large intermodal freight string around the layout.

The CSX engine moving freight on it's demo run.


Verdict: This is a DC powered engine.

Well...poop. All my other engines are AC. So guess, I've got a DC engine in the collection. 

In other news, added a new box car to the collection. A nice Showcase line car for the DT&I.


Sunday, January 24, 2016

Tunnel Portal update completed

The portal update is completed!


A little bit of paint to cover the plaster and a little bit of flocking to cover the paint. Then it was a matter of gluing in some lichen for the shrubs and we're good to go!


Good view down the tunnel. You can see the exit on the other end. The 'rock wall' on the right needs a little work, but from a distance looks just fine.


Sunday, January 17, 2016

Tunnel Portal, take 2

Here's the back story, in 2015 I had finished the landscaping for the tunnel. It was done. Materials put away and I'd moved on to finished the yard. In the fall, I ran a double stack container train onto the track and routed it into the tunnel.

BAM!

I was not expecting that to say the least. The top container and clipped the top of the portal entrance and would not fit. It derailed five cars, spilled containers all over the track and caused a coupler pocket to explode.  I should have taken a picture - it was an accident worthy of an FRA report.  I was in shock - how could this happen. I knew I had run the train over this track before and never had a problem.

Yeah...before you installed the final tunnel portal. Idiot!

Yep, it's true I'd not tested the track after installing the last portal. It was a converted MTH portal and had been cut down to be closer to S gauge. When it was cut down, it was clearly cut down to an older clearance standard and not the modern standard.

This weekend I finally fixed the portal. Ripped out the old portal and installed a new one from Pre-size model specialties.  It was not hard work, just something I did not relish having to do.

The old portal, all nicely landscaped into the layout.

Overview showing the framework that comprises the tunnel.

Close up of the same space. I was able to leave most of the landscape in place.

The Plasticville church normally in the space beyond the trees was moved for this repair.

The new portal was much thinner than the old MTH version. This required inserting a styrofoam spacer to the portal,. It did not have to be pretty as it would not be visible once the potal was installed.

The spacer plugs in place.


Yes, I would forget which one belonged on which side.


The angle of the portal needed to be tweaked, so some spacers and cutting took place to support the desired placement.


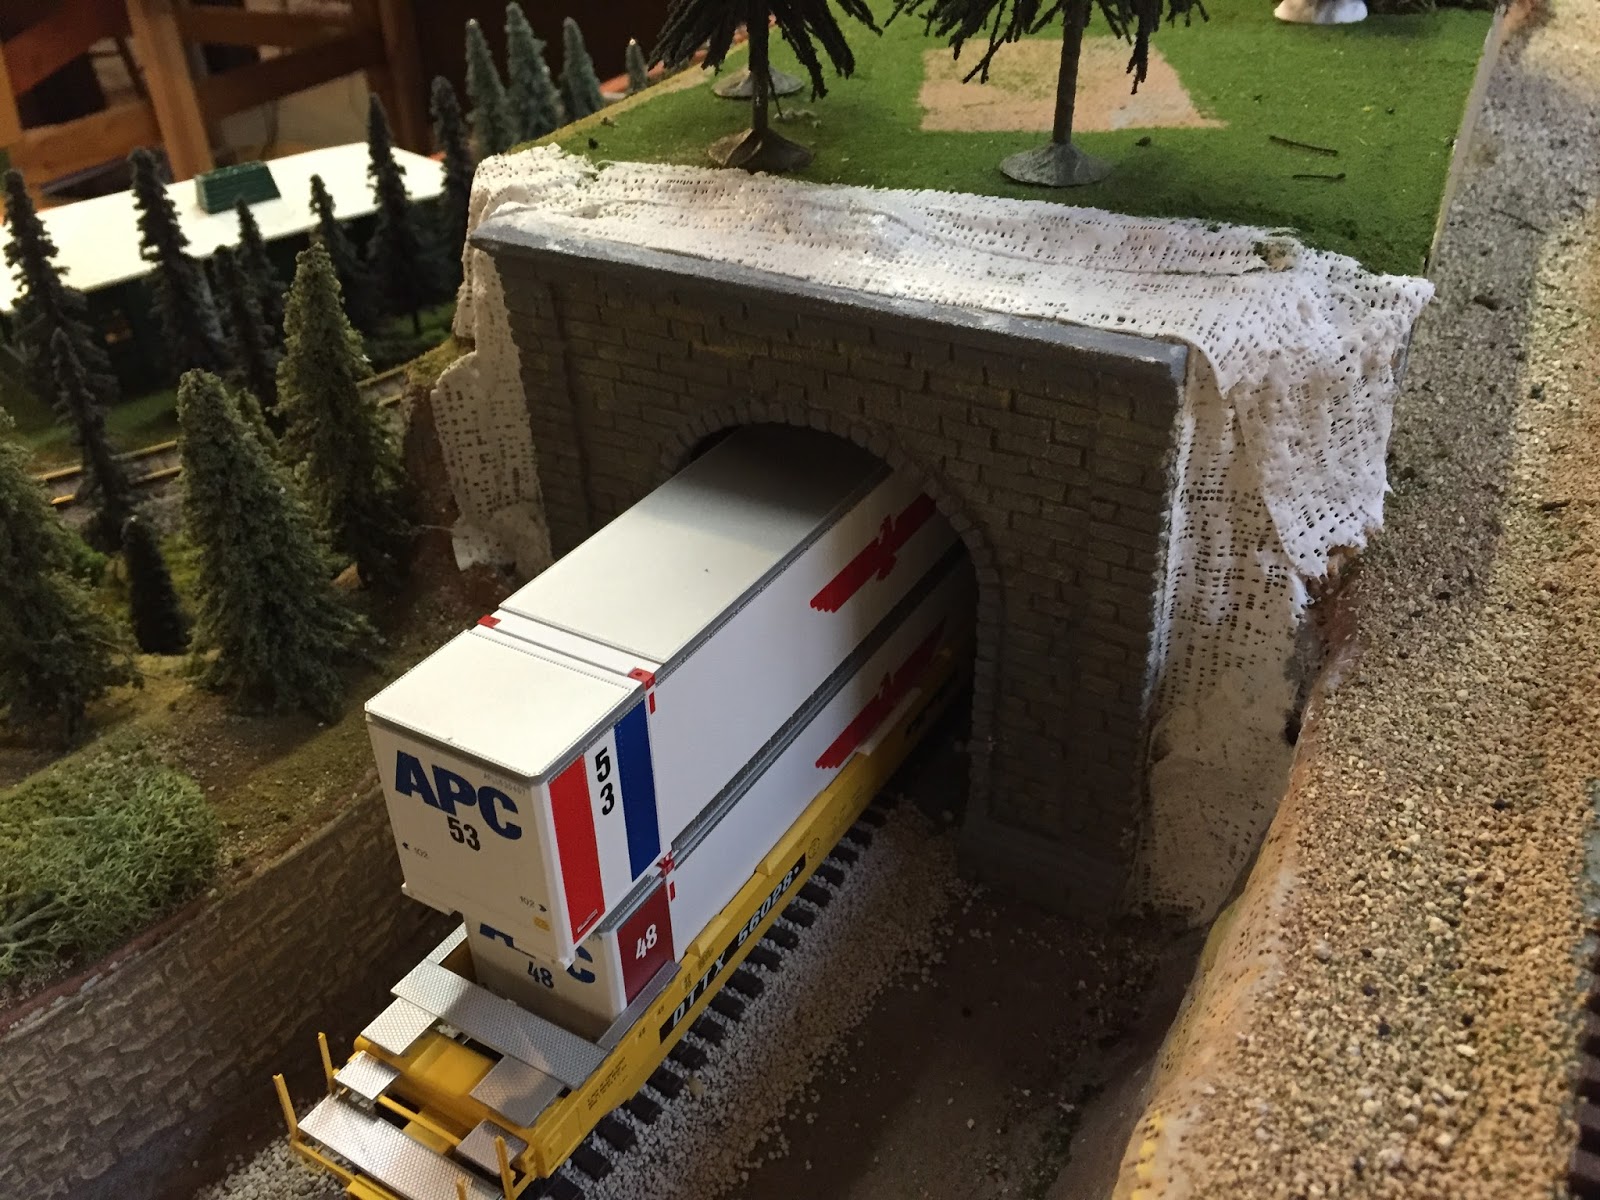
The double stack car fits into the tunnel!

Checking the portal clearance for the double stasck cars.


Sliding into the installed tunnel portal. Still have to finish the painting and landscaping..

Here's a video showing the clearance test of the double stack car.


Sunday, December 14, 2014

What's new on the layout?

It's been a while since the last post. Here's what's new new on the layout....

Picked up a customized American Flyer K5 locomotive recently. The prior owner did a great job customizing it for the Pennsylvania railroad.

The latest addition to the roster.


Marker lights, bell and headlights. Really well done work on this.


Whoever did this added the running boards to the headlight.


close up on the tender. Really nice work on this!


But wait, there's more!

I'm building coal loads for the S Scale America Coal Porter cars.